Easy baked lemon & honey chicken that is loaded with great flavours and you can make in a hurry with just a few simple ingredients. Hope you enjoy, let me know in the comments if… More

Easy baked lemon & honey chicken that is loaded with great flavours and you can make in a hurry with just a few simple ingredients. Hope you enjoy, let me know in the comments if… More

This creamy mustard chicken recipe is so simple, and only requires one pot. It’s made with white wine, mustard, cream and veggies for the most amazing flavor. Enjoy ! Ingredients for 4: 2 tablespoons Dijon mustard… More

Hi everyone, Today’s recipe is super quick & easy. Who does not need that during quarantine? This oven baked recipe is not traditional as I am using canned chickpeas instead of dried chickpeas. Using… More

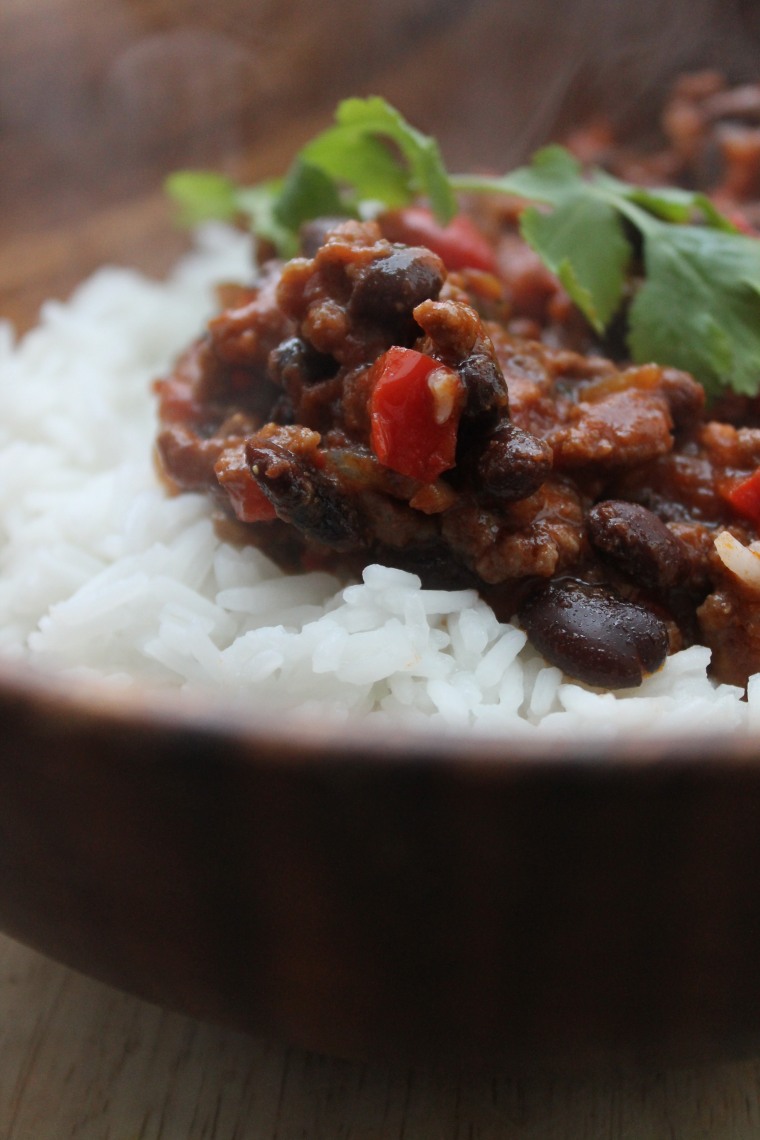
This Chili recipe is ready in 30 minutes! This chili recipe is full of flavor and can be served with pasta, rice or even on burger buns ! Enjoy !
Go to the end of the page for the french version 🙂
Ingredients for 4 :
Methods:
1 . In a wok or large sauce pan, saute diced onion and pepper with the olive oil for 4-5 minutes.
2. Add all the seasonings, stir until well combined and cook for another 2 minutes.
3. Add the ground beef and cook until the meat becomes brown.
4. Pour in the peeled tomatoes and 1/2 cup water, and bring to simmer. Cook for about 15 mins and add black beans.
5. Cook for another 10 minutes or until the sauce thicken enough to your liking.
En français
Ingrédients:
Méthode:
1 . Dans une grande poêle ou wok, ajouter l’huile d’olive et cuire l’oignon et le poivron pendant 4-5 minutes.
2. Ajouter toutes les épices, mélanger bien et cuire la préparation pendant 2 minutes.
3. Ajouter le bœuf haché et cuire jusqu’à ce que le viande se colore.
4. Ajouter la boite de tomates pelées avec 1/2 verre d’eau et faites cuire pendant 15 minutes. Ajouter la boite de haricots noirs.
5. Faites cuire pendant 10 minutes supplémentaires pour que la sauce épaississe. Servez avec du riz ou des pâtes.

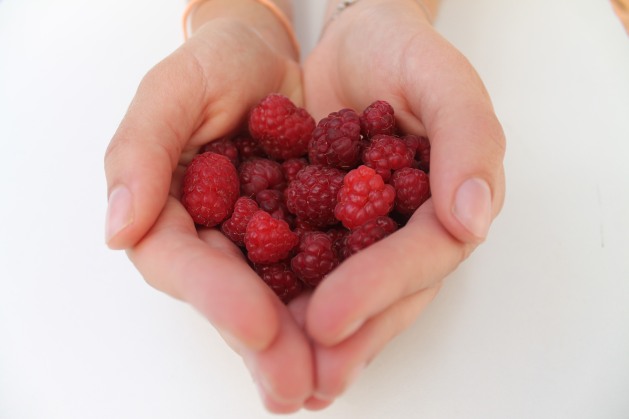
We have a tone of raspberries growing in our garden, I think raspberries go so well with tiramisu. It is a real variation of the classic tiramisu but I love it !
Ingredients for 4:
Method:
1 . Separate the egg white from the yolk and set aside in 2 different bowls.
2 . Mix the egg yolks and sugar together until they become pale yellow and add the mascarpone cheese.
3 . In the other bowl, beat the egg white until stiff peaks form. Carefully fold into the mascarpone cheese mixture.
4 . Using a mixer, mix the speculos or lady fingers until you get big chunk.
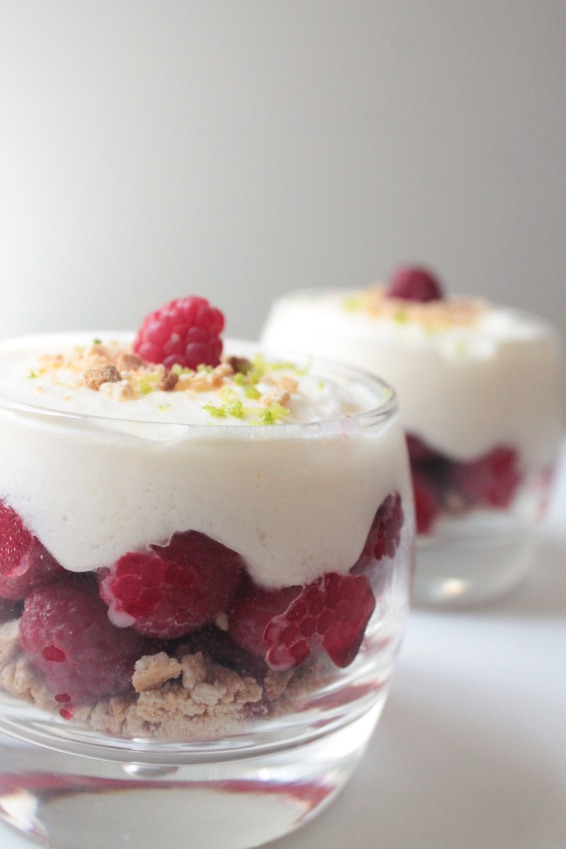
5 . Place a layer of speculos/ladyfingers in the bottom of your serving glasses. Add a layer of raspberries and a layer of mascarpone cheese mixture. Finish with some speculos/ladyfingers and one raspberry on top of the mascarpone mixture.
6 . Add some lime zest on top and refrigerate for a least a hour.

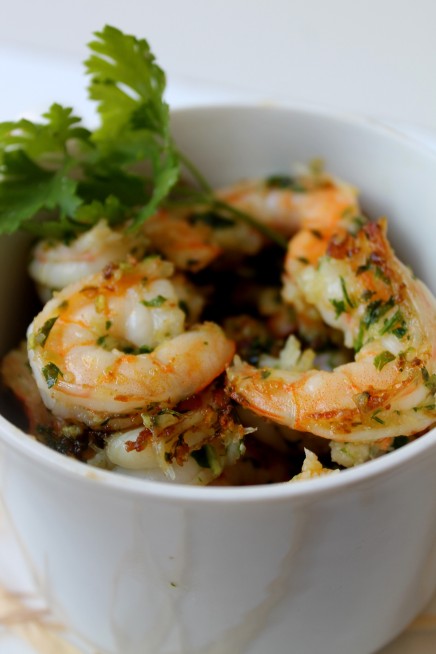
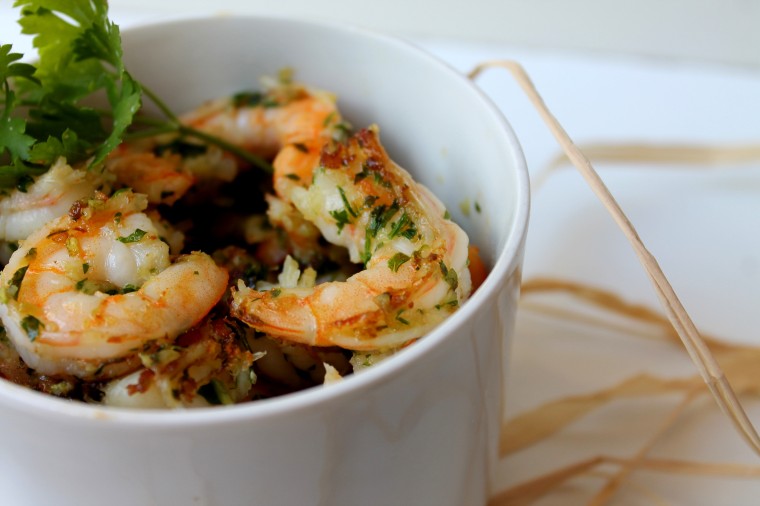
Garlic & Parsley Shrimp recipe’s is ready in less than 15 minutes! This healthy recipe is full of flavor and can be served with pasta, rice or on top of your salad ! Enjoy !
Ingredients for 2 :
Methods:
1 . In your mixer, add the parsley and garlic. Mix until it’s properly chopped.
2 . In a large skillet over high heat add the olive oil. Then, add the shrimp to the pan and make sure to spread it out so it cooks evenly.
3 . Cook for about 3 minutes on each side until slightly golden. Add the parsley and garlic mixture and stir to combine. Lower the heat to medium and keeping cooking the shrimps until it become opaque.
4 . Add some salt and pepper to taste.

The mint growing in my garden is prolific. I really love mint especially in drinks because it adds such a fresh taste to it. My dad loves Mojitos – I really do too to be honest – and I thought why not making his favorite drink on father’s day?
Ingredients for 2:
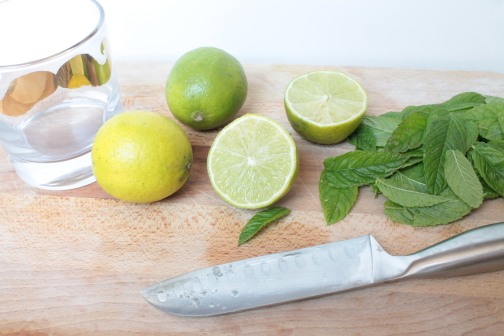
Method:
1 . In each 10 oz glass, add mint leaves, 6 slices of lime and cane sugar (or simple syrup).
2 . Using a muddling tool (or wooden spoon), muddle ingredients in the bottom of the glass to release the flavor and juices. Be careful not to over muddle the mint.
3 . Fill the glass to the top with crushed ice, and then add the rum.
4 . Finally fill the top with sparkling water and serve.


The city, home to over 8.5 million people, contains so much to see and do. We only had 3 days to explore the city so we spent every waking moment wandering around the streets of Manhattan. You won’t see even a tiny percentage of this vast city in three days, but this is a list of the must do’s of my favorite places. They are a mix of shopping, tourist spots and our favorite places to eat.
DAY 1:
STOP #1 – Rockefeller Center – 34$: Located right in the heart of Midtown Manhattan, it’s nearly impossible to visit New York without going to the Rockefeller Center. When going to NYC for such a short trip, we had to choose between going up to the Empire State Building or the Rockefeller Center. After some readings online, we picked the Rockefeller for the 360 degrees view of the city it offers. At the top of the observation deck you can almost see all of Manhattan. North, you can see Central Park, and south brings a view of the Empire State Building and the other beautiful buildings of New York.


STOP #2 – Central Park – free: After going to the top of the Rockefeller Center, we walked to Central Park. Central Park was perfect to relax and leave the crowds behind us. You can spend couple hours just wandering in the park. It’s huge. Also, it’s free – great news, isn’t it? – there are lots of paths to walk, and the possibility to rent bikes or row-boat.


STOP #3 – The Metropolitan Museum of Art – free: The Metropolitan Museum of Art -MET is one of the biggest museums in the world, and if you can only visit one museum during your trip I would definitely recommend this one. It seems like its galleries never end. 
STOP #4 – Times Square – Free: It is definitely something touristy to do. However I am not going to lie, I didn’t particularly enjoy Times Square as it was packed with people and there is not much to do in this area except if you are going to see a show.
DAY 2:
STOP #1 – Grand Central Station – free: it’s the city’s historic train station. It is definitely a place to see. It almost seems like time stops for a couple of minutes looking at all those people trying to catch their trains. Grand central often appears as a romantic backdrop in movies and TV shows, such as The Avenger, Super Man or Gossip girl. You should definitely take the metro at least once just to get the feel of a real New Yorker.


STOP #2 – Staten Island Ferry – Free: The Staten Island Ferry is one of the last remaining ferry systems in New York City that transport people between Manhattan and its boroughs. Hop aboard this free ferry to see one of New York City’s most famous attractions: The Statue of Liberty. We decided it was not worth the money (and the time) to go up the Statue of Liberty, and instead chose to take this ferry to Brooklyn where you have a beautiful view of both the Statue of Liberty AND the New York Skyline.


STOP #3 – Brooklyn Bridge – Free: You will get a lot of wonderful views of downtown as you walk across the bridge. I enjoyed doing this walk at night as well, when downtown Manhattan is all lit up, it seems like you are in a different place.


DAY 3:
STOP #1 – High Line Park – Free: The High Line is a converted train track that is now an urban walking park. This walk is one of the best things to do in the city, especially on a nice day. It’s a beautiful green park that runs from the Meatpacking District to West 34th Street. Along the way you’ll pass through the artsy neighborhood of Chelsea.


STOP #2 – Chelsea Market – Free: Next up was lunch so we headed towards the Chelsea Market that I had heard so much about. If you’re looking for a place to get food, shopping and stay inside, away from the summer heat, nothing beats the appeal of Chelsea Market. The downside – which really isn’t – is that it’s hard to find a place to eat as there are so many options. But we finally manage to choose Dickson’s Farmstand which offers meats and house-made charcuterie as well as a rotisserie. We shared half a chicken with roasted potatoes, there are no words to explain how delicious this meal was! On our way out we came across a doughnuts shop called Doughnuttery which looked like it was making fresh mini donuts so I had to try it. These little donoughts were super cute and were pretty good (not the best donuts I ever had though).


STOP #3 – Shopping: Macy’s Herald Square is of course a must see as it is one of the largest stores in the world. Walk around and you will find all the shops you have dreamed of.
STOP #4 – The Museum of Modern Art ~ MoMA – free every friday 4-8pm: Head over to the MoMA for lots of beautiful but weird modern art that can be quite bizarre. I have to say, I’m not really into modern art but it is worth the visit.


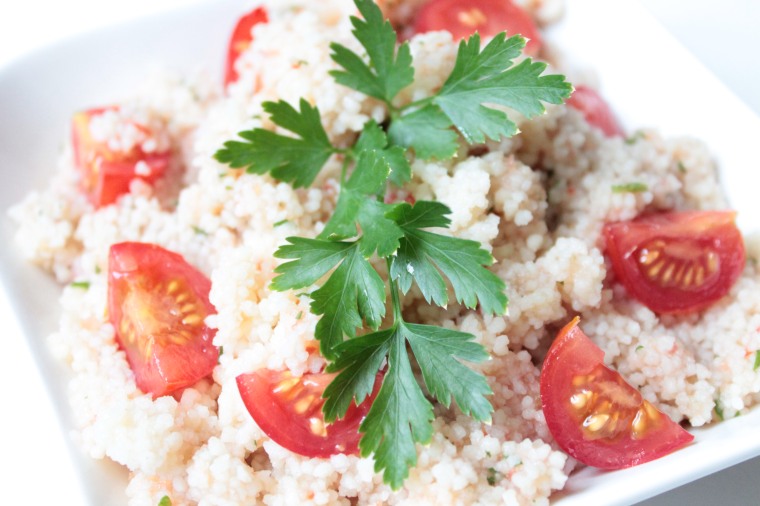
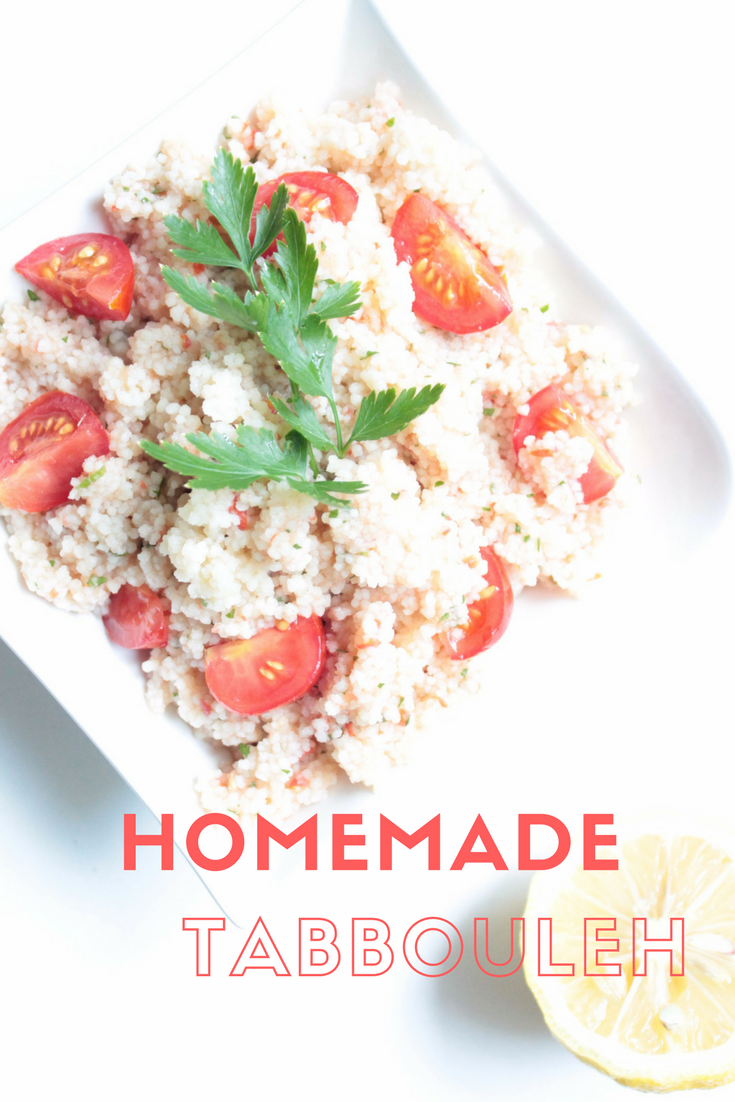
In the hot summer days – like we had all last week- I like to keep meals as simple as possible. I kept finding myself reaching for recipes in needs of fresh herbs just like this classic homemade tabbouleh recipe. It is quick and easy to make, chocked full of fresh herbs from my garden, and tossed with fresh organic lemon juice. You are going to love it !
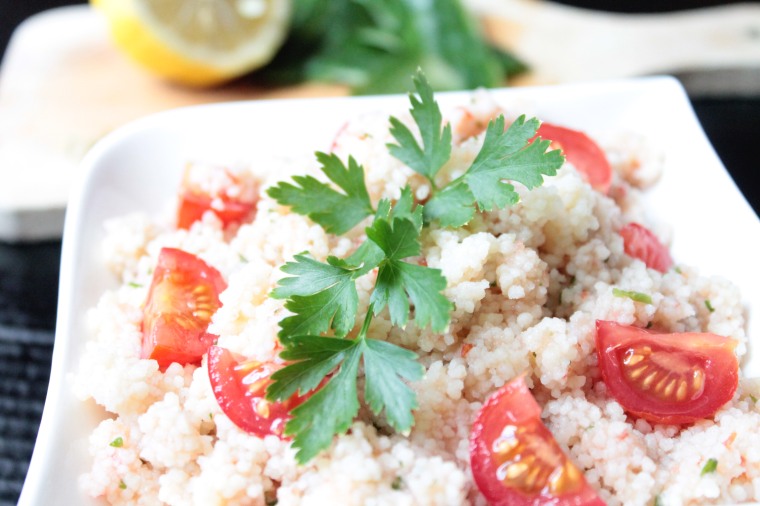
Ingredients for 3 persons:
*Note: For a gluten free version, use quinoa.
Method:
1 . Prepare the couscous: In a large bowl, pour the boiling water over the couscous and cover with plastic wrap or a plate of the size of the bowl. Let it sit for 15-20 minutes until softened. If the couscous hasn’t absorbed the water or still tastes crunchy after this time, cover and let it sit for a few more minutes. Gently break apart and fluff the cooked couscous with a fork. Let it cool for 45 minutes.
2 . Tabbouleh: In your blender, combine the 3 tomatoes, cucumber, lemon juice, olive oil, mint, parsley, salt and pepper. Blend until it is smooth but don’t worry if there is still some chunk.


3 . Then combine the prepared couscous and this mixture and stir until well mixed. Add the cherry tomatoes. Leave in the fridge until serving.
Suggested Grocery List:
PIN IT !
orange & clementine is a participant in the Amazon Services LLC Associates Program, an affiliate advertising program designed to provide a means for us to earn fees by linking to Amazon.com and affiliated sites. I am not sponsored by any of these products, but am bringing you info on how to purchase them because I LOVE THEM!!!

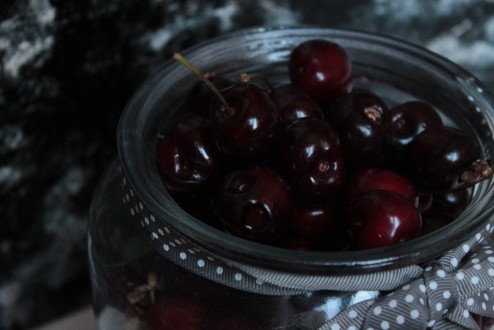
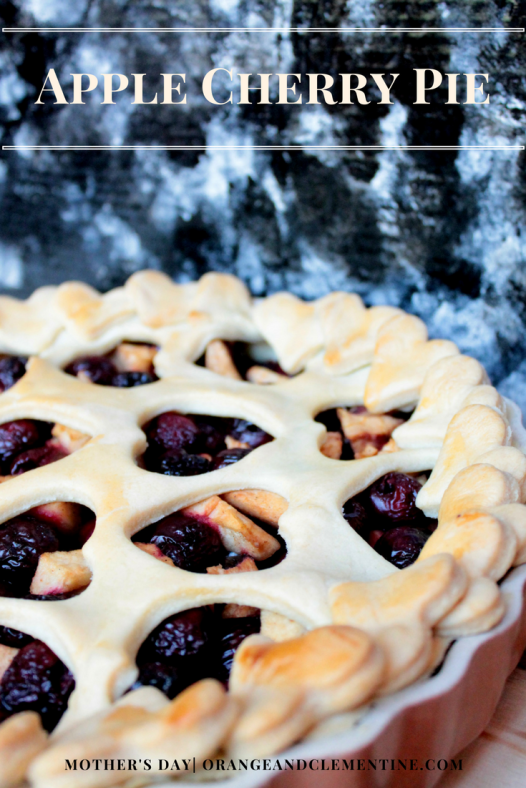
❤ Today is French Mother’s Day aka “La fête des mamans”. Also, when fresh fruit are in season there is nothing like making your own pie filling. So here is a yummy recipe with cherries from my garden and ‘I heart U’ pie crust. Sending love to all the mummies up there ! ❤
Ingredients:
Utensils:
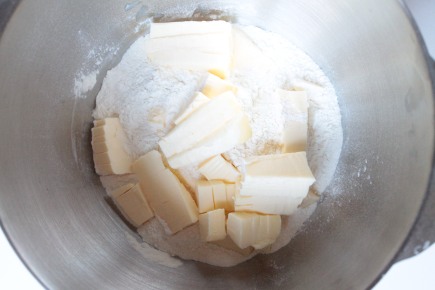
For a homemade dough:
Method:
1 . For the dough: Combine flour and salt in a medium bowl. Cut in the softened butter with your pastry blender (or fork if you don’t have one) until mixture looks like crumbs. Stir in enough water just until flour is moistened. Divide the dough in half and shape each into two balls. Wrap each in plastic food wrap and refrigerate for at least 25 minutes.
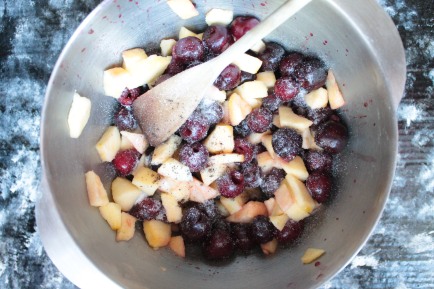
2 . In a medium bowl, combine the sugar, apples and cherries and gently toss until well coated.
3 . Preheat oven to 400F. Place parchment paper at the bottom of your 9-inch deep dish pie.
4 . Roll out one disk of dough on lightly floured surface into 12-inch circle. Place dough into 9-inch deep dish pie plate and refrigerate.


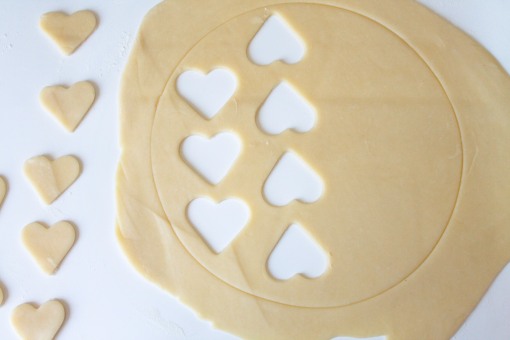
5 . Once the second crust is rolled out on a floured surface, lightly pressed with an inverted pie plate (of about the same size) onto its surface to see where the edges of the crust are going to be.
6 . Then, cut out alternating rows of hearts with the cookie cutter. Make sure to save the cut-out heart pieces. They will be going along the edge of the crust.
7 . Take the first crust out of the refrigerator. Add the filling of apples and cherries.
8 . Lift the second crust pie and slide it off the top. You can gently pick it up and readjust. Line the heart around the edge, and brush the whole surface with the egg wash.

9 . Bake for 45 minutes. Cool pie at least 20 minutes before serving

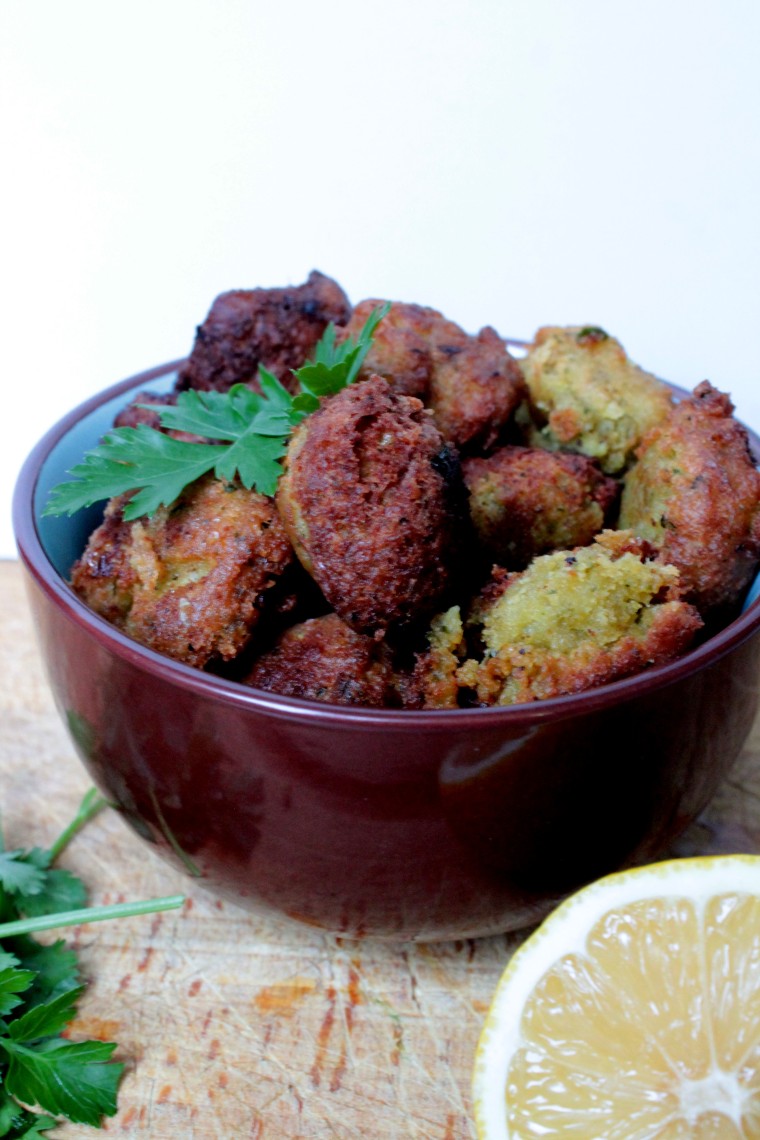
Today’s recipe is homemade falafels. The traditional recipe uses dry chickpeas. If you wanted to make falafels today, you would have needed to soak the chickpeas overnight. Umm not great. The things is yesterday I felt like doing falafels for dinner with the fam since we had some tatziki and blinis in our fridge. So yes it won’t be the traditional recipe as I used canned chickpeas but it was still delicious !
For this recipe you will need a lot of herbs, cilantro and parsley – fresher your herbs, taster the falafel will be. I have fresh parsley and cilantro in my garden (thanks dad) and so it was even more exciting to make this recipe !
Bon appetit !
Mathilde xx
Ingredients:
Method:
1 . Drain the garbanzo beans from the water and dry them completely.
2 . Transfer the garbanzo beans along with the parsley, cilantro, onion, garlic, cumin, salt, baking powder and lemon juice to a food processor. Process the mixture just until the ingredients are minced but not pureed – You still want it to have tiny chunks of chickpeas running through your mixture.
3 . Transfer the falafel mixture to a bowl and add the flour. Squeeze the falafel mixture into 1.5-inch balls.
4 . Heat an inch of oil in a nonstick skillet over medium heat. When the oil is ready, place the falafel balls into the oil. Let it cook for about 2-3 minutes on each side (until golden brown).
5 . Reserve in a bowl cover of paper towel to absorb the extra oil.

Hey guys,
I am back with this new summery recipe. For starters or appetizers, there is nothing like a savory cake! This recipe is super easy but really good !
Ingredients:
Method:
1 . Preheat oven to 400°F. In a large bowl, add the flour, baking powder, eggs, salt, pepper and canola oil.
2 . Mix well, then add milk, grated cheese, green olives and bacon.
3 . Cover a cake pan with parchment paper and pour in the mixture.
4 . Bake for about 45 minutes. Let cool for 15 minutes, and serve warm or cold.

This Gluten Free Brownie is one of the best chocolate brownie ever. It’s fluffy, rich in chocolate, crispy with walnuts and gluten free. One thing though and that is do make sure that you use the best quality chocolate you can find. Enjoy xx
Ingredients:
Methods:
1 . Preheat oven to 400 °F.
2 . Melt chocolate chips and butter in a double boiler*.
3 . In a bowl, mix together the sugar, flour, almond meal, vanilla extract and eggs.
4 . Slowly add the chocolate mixture into the bowl and mix again. Add the walnuts.
5 . Cover a 9*9″ brownie pan with parchment paper and pour the brownie mixture.
6 . Bake for 20 minutes. (Don’t over cook it, it will lose its fluffiness). Let it cool for 15 minutes before serving.
* Double boiler technique:
Add 1” of water to a medium saucepan or pot and bring to a very gentle simmer. Place a heat-safe bowl on top of the pot so that the bottom of the bowl is not touching the water. You want the steam from the water to gently warm the bowl. Add the chopped chocolate and butter to the bowl and stir occasionally with a spatula until smooth and melted.
